How to invite an agent with the "Invite Agent" button
How to invite an agent with the "Invite Agent" button

This guide provides a step-by-step process for inviting agents to Central, ensuring a smooth onboarding experience. It covers everything from agency selection to account creation and verification, making it easy for users to navigate the system. By following these instructions, users can efficiently manage agent invitations and ensure that new agents are set up correctly.
1. From the Dashboard, scroll left and click on "Agency Management".

2. In Agency Managment, scroll to the right and click on "Invite Agent".

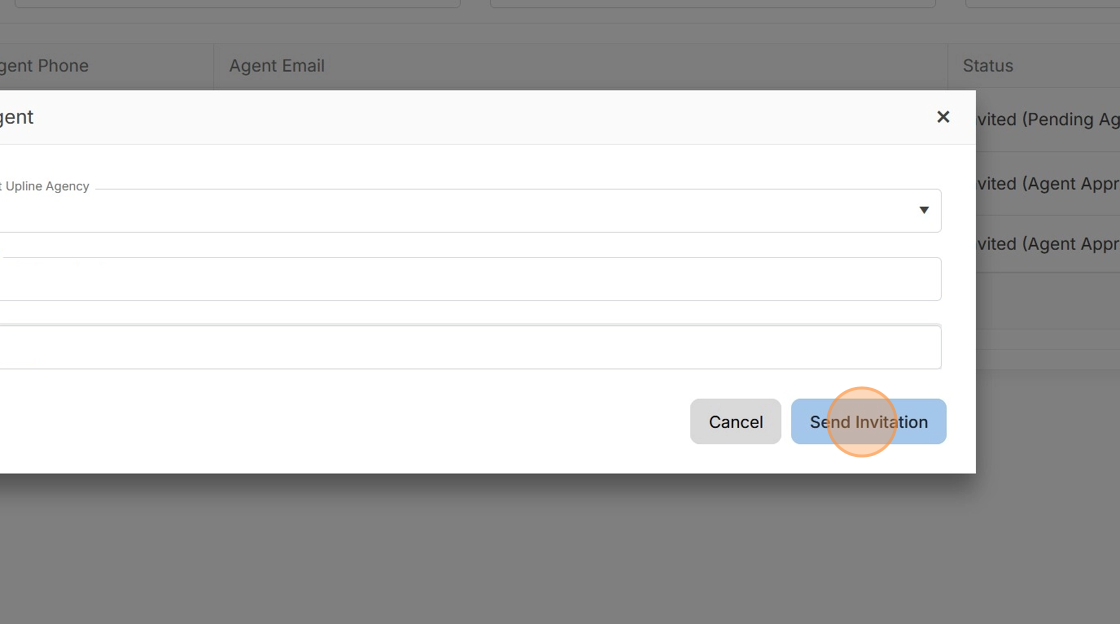
3. In the pop-up, choose the Upline Agency if available, the primary email of the agent and NPN.


If the Upline Agency is not available, the agency needs to be added first. Consult with the "How to invite an agency with the 'Invite Agency' button" or "How to invite an agency with the 'Add Agency' button" articles if you are the FMO or Agency.
4. Click "Send Invitation".
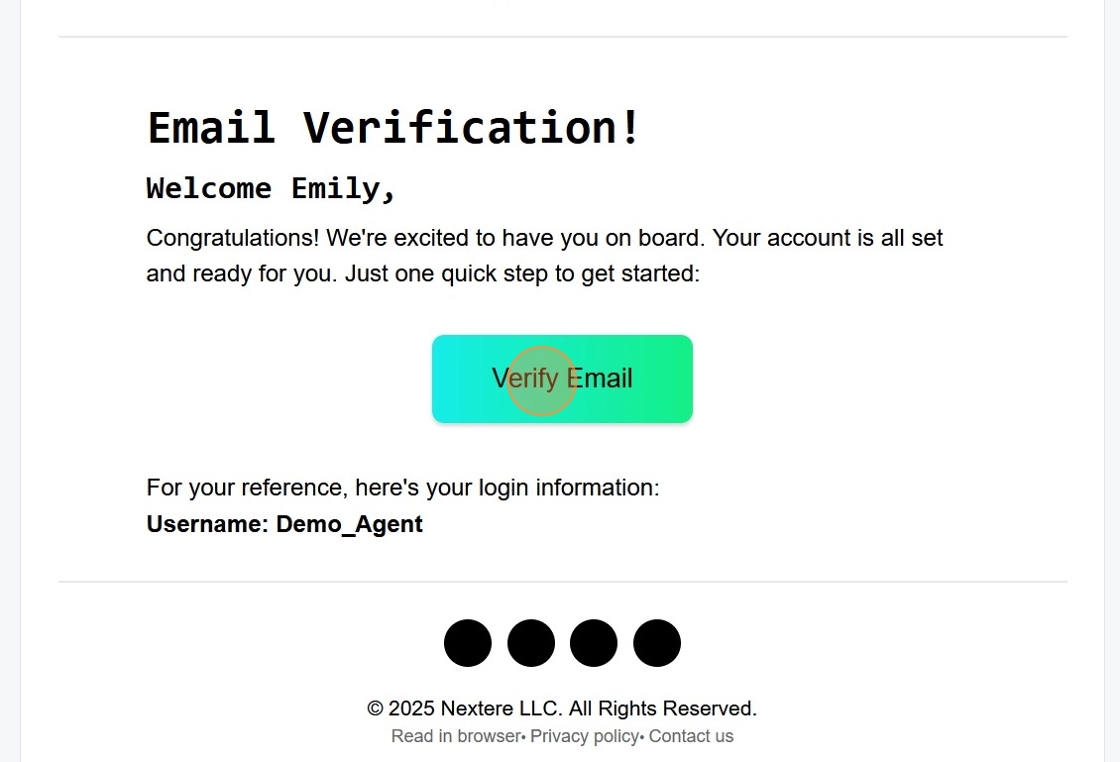
5. User will need to check their inbox for the invitation email from Nextere.

6. Click "Set up Account".

7. The next window will prompt the user to create their account.

8. When completed, click "Sign Up".

9. The user will know their account was created when a congratulatory pop-up appears. Check the inbox for a verification email.

If the user has not verified their email, they will see the following pop-up the next time they log in.
10. If the user has not received their verification email, they can log in and click "Resend".

11. Go to the inbox and click on the verification email.

12. Click "Verify Email".
13. Once the email is verified, a confirmation pop-up will appear. Click on "Return to Dashboard".

14. Log in with the newly created credentials and click "Sign In".

15. Once logged in the user will be prompted to fill in the required fields.

16. Click "Verify With NIPR".

17. Click "Continue".

18. In the next page, fill in the required fields.

19. Click "Update" when finished.

20. Click "Continue".

21. The user will know their onboarding is completed when they see the Onboarding Complete pop up.

Related Articles
How to Invite and Onboard a New Agency
How to invite an agency with the "Add Agency" button This guide provides a step-by-step process for inviting an agency using the "Add Agency" button. This guide will also show the steps the Principal Agent needs to take to successfully complete their ...How to create a profile using the invitation email
How to create a profile using the invitation email Congratulations on joining the platform! This guide will walk you through the secure process of activating your account, verifying your identity, and completing your professional profile. The ...How to invite multiple agents with the "Import" button
How to Bulk Invite Agents via CSV Import Introduction The Bulk Agent Import tool is designed for FMOs and Agency Administrators who need to onboard large teams quickly. By using a standardized Excel template, you can invite hundreds of agents to ...Cómo invitar a un agente con el botón "Invitar agente"
Cómo invitar a un agente con el botón "Invitar agente" Esta guía ofrece un proceso paso a paso para invitar a los agentes a Central, garantizando una experiencia de incorporación fluida. Cubre todo, desde la selección de la agencia hasta la creación ...Navigation Menu: Agent Profile
Navigating the Agent Profile This section showcases the options users have to edit their agent information. Introduction The Agent Profile is the central management area for your professional identity within the platform. It allows you to maintain ...